
01 / Thermography
What the camera is observing
Thermal cameras detect infrared radiation reaching the sensor. For ordinary building inspection, the useful view is of accessible surfaces; it is not an X-ray picture of the layers inside a wall or roof. A condition beneath a surface may influence its temperature pattern, but the pattern still needs to be interpreted.
This distinction changes the conversation. Instead of asking whether a camera can prove a leak from the air, ask whether the project can document patterns that help identify areas for closer examination. A thermal view can direct attention to a location. The next step may involve a qualified building professional and a different form of verification.
Source: Teledyne FLIR: What Thermal Imaging Can and Cannot See Through
02 / Thermography
Different materials do not tell the same thermal story
Emissivity describes how effectively a surface emits thermal radiation. Reflected energy can affect the apparent temperature, particularly on low-emissivity surfaces such as polished metal. FLIR explains that an object can appear warmer or cooler because it reflects surrounding objects, rather than because its own temperature differs as the image suggests.
That is why the material and viewing context belong in the record. Two adjacent components may look different because their surfaces behave differently. A reviewer should be able to see what the target is made of and how it was viewed. Do not treat every bright spot on a reflective surface as a confirmed hot component, or every cool patch as proof of a hidden moisture condition.
Source: Teledyne FLIR: How Emissivity Affects Thermal Imaging
03 / Thermography
Color is a display choice; the scale gives it meaning
A thermal palette assigns visible colors or shades to a range of thermal values. Changing the temperature scale can make small differences easier to notice. FLIR’s measurement guidance also emphasizes focus, a suitable measurement range and appropriate parameters when temperature analysis is required.
Look at the legend before comparing two images. A red area in one image and a red area in another need not represent the same value if the scales differ. For a client report, a clear legend and an associated visible image are often more useful than a dramatic palette. When comparing visits, document the relevant settings instead of relying on visual similarity alone.
Source: Teledyne FLIR: Measuring Temperatures: Focus, Scale, Parameters and Tools
04 / Thermography
Prepare a property project around one question
Tell the operator what the building team is investigating: an area associated with a reported issue, a comparison after work, or a broader documented review. Share the construction and material information you have, recent work, the timing of reported symptoms and any access constraints. The capture plan should be tailored to that question rather than assuming the same schedule is suitable for every thermal task.
Ask what environmental and operating context will be recorded. Relevant details can include recent weather, sun exposure, the condition of the surface and building operation. The operator or reviewing specialist should decide which conditions are appropriate for the purpose. If the available window is unsuitable, agree on a different visit or a narrower result that can be described honestly.
05 / Thermography
An example: an unusual roof pattern
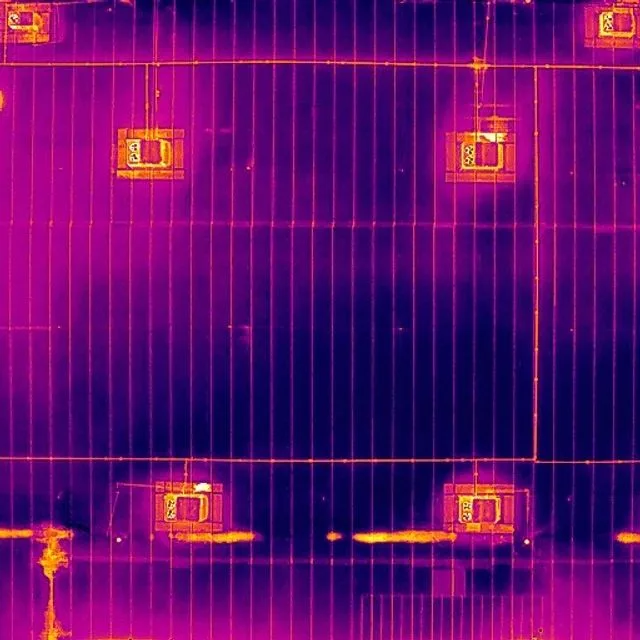
Imagine a roof-area image with a distinct warm patch. The useful first statement is that a thermal pattern was observed at a specific location under recorded conditions. Pair it with a visible view and the roof-area identifier. Then consider what additional information is needed before assigning a cause. The material, surface condition, building activity and neighboring features may all matter.
A careful record might recommend that the owner’s qualified roofing professional examine that location using an appropriate verification method. It should not jump from color to a repair specification. This preserves the value of the thermal observation while keeping the eventual decision connected to adequate evidence. The same discipline applies to unusually cool patterns.
06 / Thermography
What a useful thermal handoff contains
Thermal work becomes easier to reuse when another reviewer can reconstruct the context. Give observations identifiers and explain how to find them. Keep the associated visible view, the thermal view and the relevant notes together. Identify areas that were not captured or could not be interpreted confidently, and distinguish a display export from any original data supplied.
The client’s final question should be: what does this record help us do next? A clear answer may be to inspect a named area, compare a follow-up visit or ask a specialist a better question. Thermal imagery is especially valuable when it makes the next investigation more focused, without presenting uncertainty as a finished diagnosis.
- Location and observation identifier.
- Associated visible and thermal images.
- Capture date and relevant conditions.
- Scale, units and analysis context where applicable.
- Clear observation, limitations and suggested next review.
VERIFY THE DETAILS / KEEP EXPLORING
Sources & further reading
Original explanation by Fly Maxwell. Technical and regulatory details are linked to the responsible organizations below. Product features, software plans and operating rules can change; check the current source when planning a project or a flight.
- What Thermal Imaging Can and Cannot See Through Teledyne FLIR · reviewed October 8, 2026
- How Emissivity Affects Thermal Imaging Teledyne FLIR · reviewed October 8, 2026
- Measuring Temperatures: Focus, Scale, Parameters and Tools Teledyne FLIR · reviewed October 8, 2026
Manufacturer specifications describe the product under stated conditions. They are not a promise of project accuracy, flight duration, target detection or a particular outcome.